Relativity Trace Demo Guide
Description here…
Table of contents
- Demo Environment and Login Information
- Workspace overview
- DEMO A: Enabling Office 365 Data Source and auto-tagging documents (alerts)
Demo Environment and Login Information
Reach out to support@relativity.com
Relativity Trace: An Overview of Relativity for Compliance
Relativity today is primarily used for e-discovery, investigations and regulatory inquiries: typically reactive and transactional workflows. Trace is built for proactive compliance and surveillance workflows.
Trace is a Compliance product on top of Relativity used to monitor all forms of communication (audio, email, and chat plus their attachments) with an extensible engine that gets better at filtering out false positives over time. Trace can monitor and pull data from 40+ data origins. In addition, Trace can automatically extract text and meta-data from monitored content, 900+ file types are supported.
Goals of the Demo
-
See how Trace can automatically and proactively pull data from a live Office 365 instance for several Trace Monitored Individuals.
-
Highlight Trace’s capabilities of automatically extracting text and meta-data from Office 365 emails and attachments.
-
Show overall data flow from ingestion, indexing, searching, tagging (reviewing) and ultimately data disposal.
-
Introduction of the Trace Rules Engine – a way to define what type of information gets flagged upon ingestion and auto-batched out to a reviewer.
-
Familiarize you with broad Trace capabilities in a sample compliance workflow.
Demo A
In this demo we will be monitoring for “Market Abuse” conversations and automatically flag those documents as they propagate though Trace flow.
This demo has 4 simple steps:
-
Enabling pre-configured “Market Abuse” rule
-
Enabling live ingestion from pre-configured Office 365 Data Source
-
Viewing extracted text and meta-data that Trace automatically extracted from ingested emails and attachments
-
Viewing the results of the Trace Rules Engine (tagged documents)
Demo B
In this demo we will be enabling a disposal rule that is based on Data Disposal action to automatically delete data outside of a configured data retention policy.
Workspace overview
- Trace Demo: Workspace with multiple pre-created rules and Office 365 Data Source.
DEMO A: Enabling Office 365 Data Source and auto-tagging documents (alerts)
Section 1: Rules Overview
-
Go into the Trace Demo workspace

-
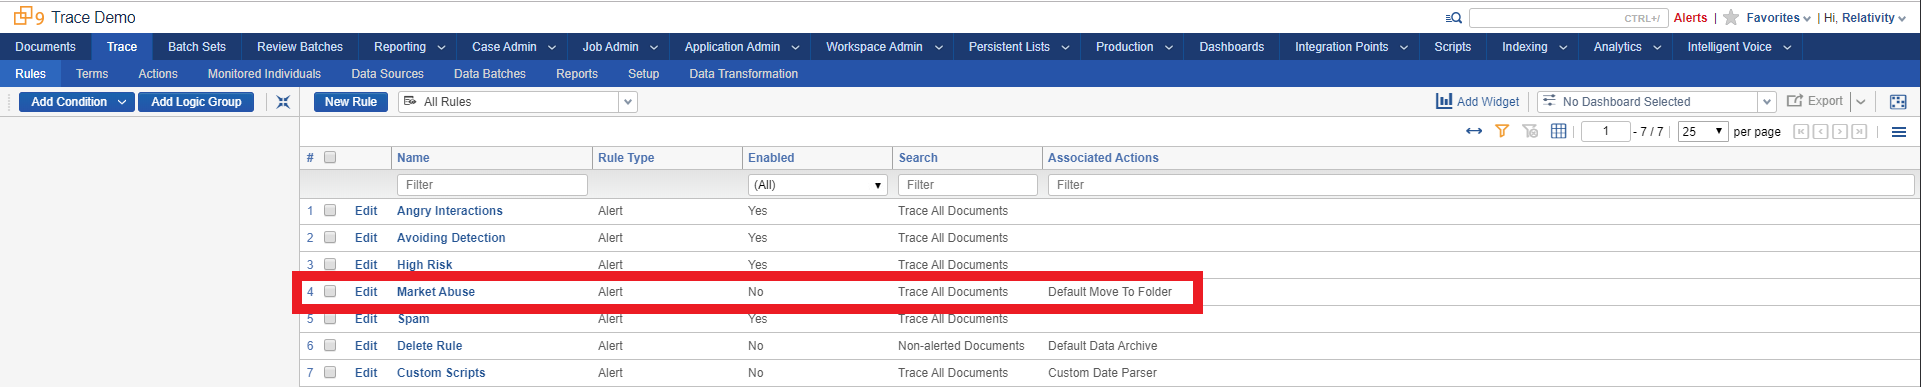
Click into the Trace:Rules tab to see sample rules in the workspace. Rules are how you define the type of content that is relevant to you. The Market Abuse rule has been pre-created for you along with a few others.
-
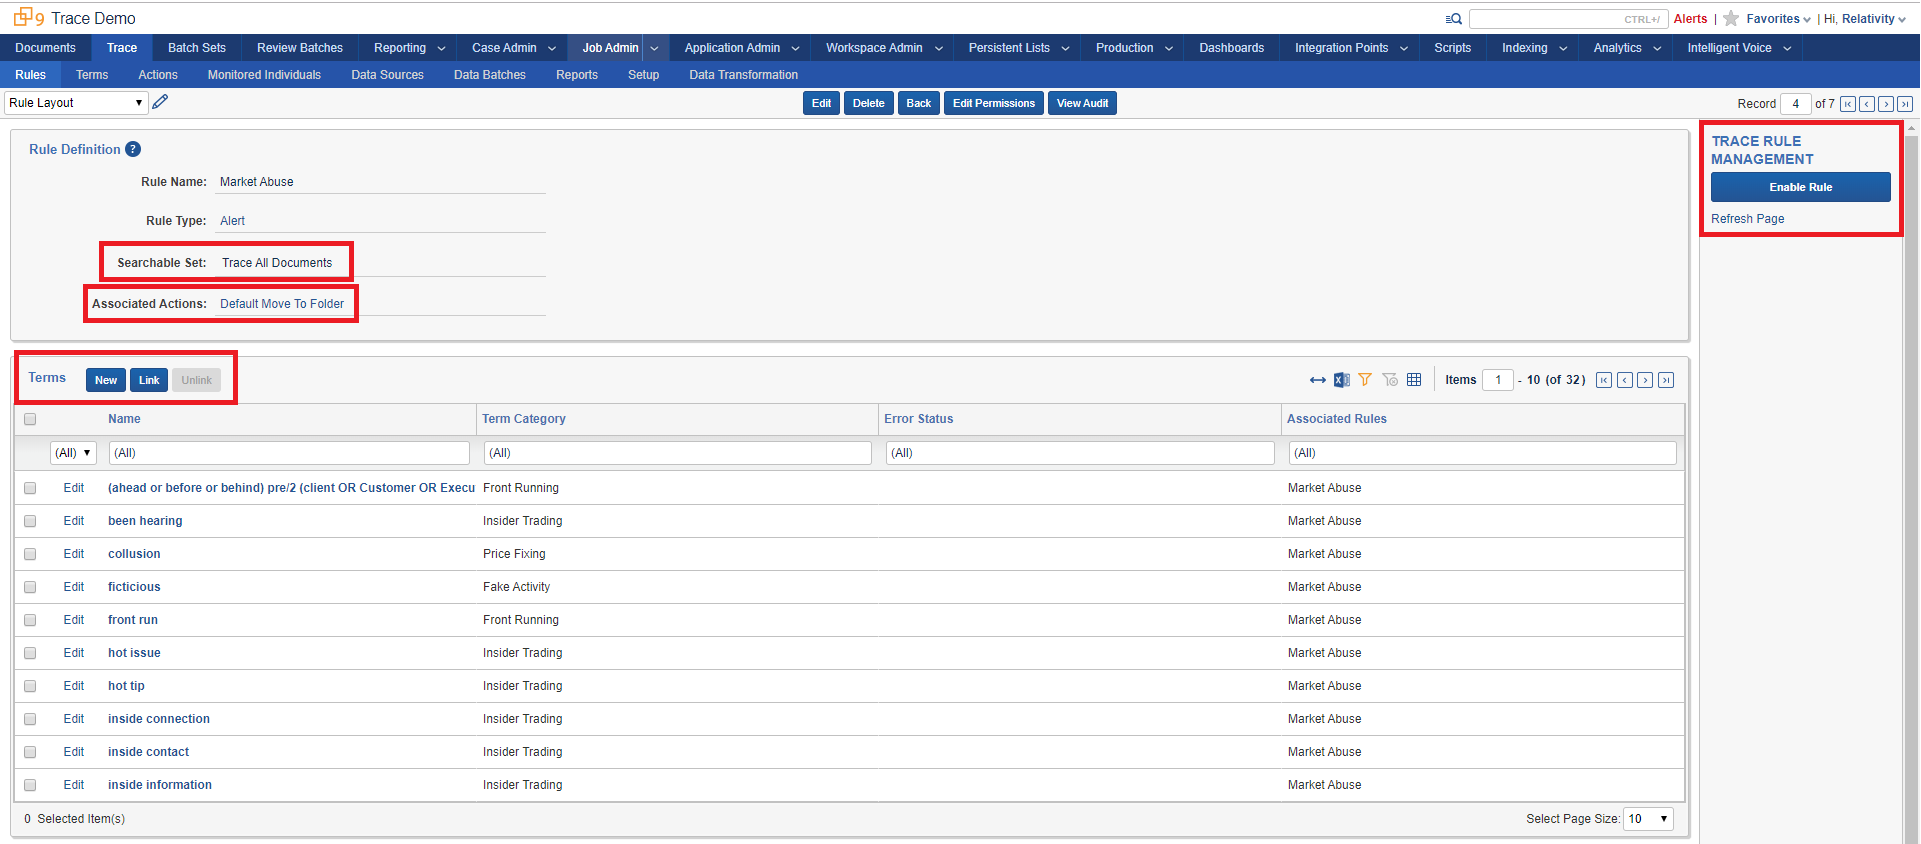
Click into the Market Abuse rule and see the options that make up this rule:
-
Searchable Set: A Saved Search that the rule runs against
-
Associated Actions: A set of actions to take on matched documents (this rule will move the matched documents to a separate folder)
-
Terms: Allows you to link Trace Terms to refine your document filter criteria with an e-discovery grade searching engine (dtSearch)
-
The rule is currently Disabled
-
-
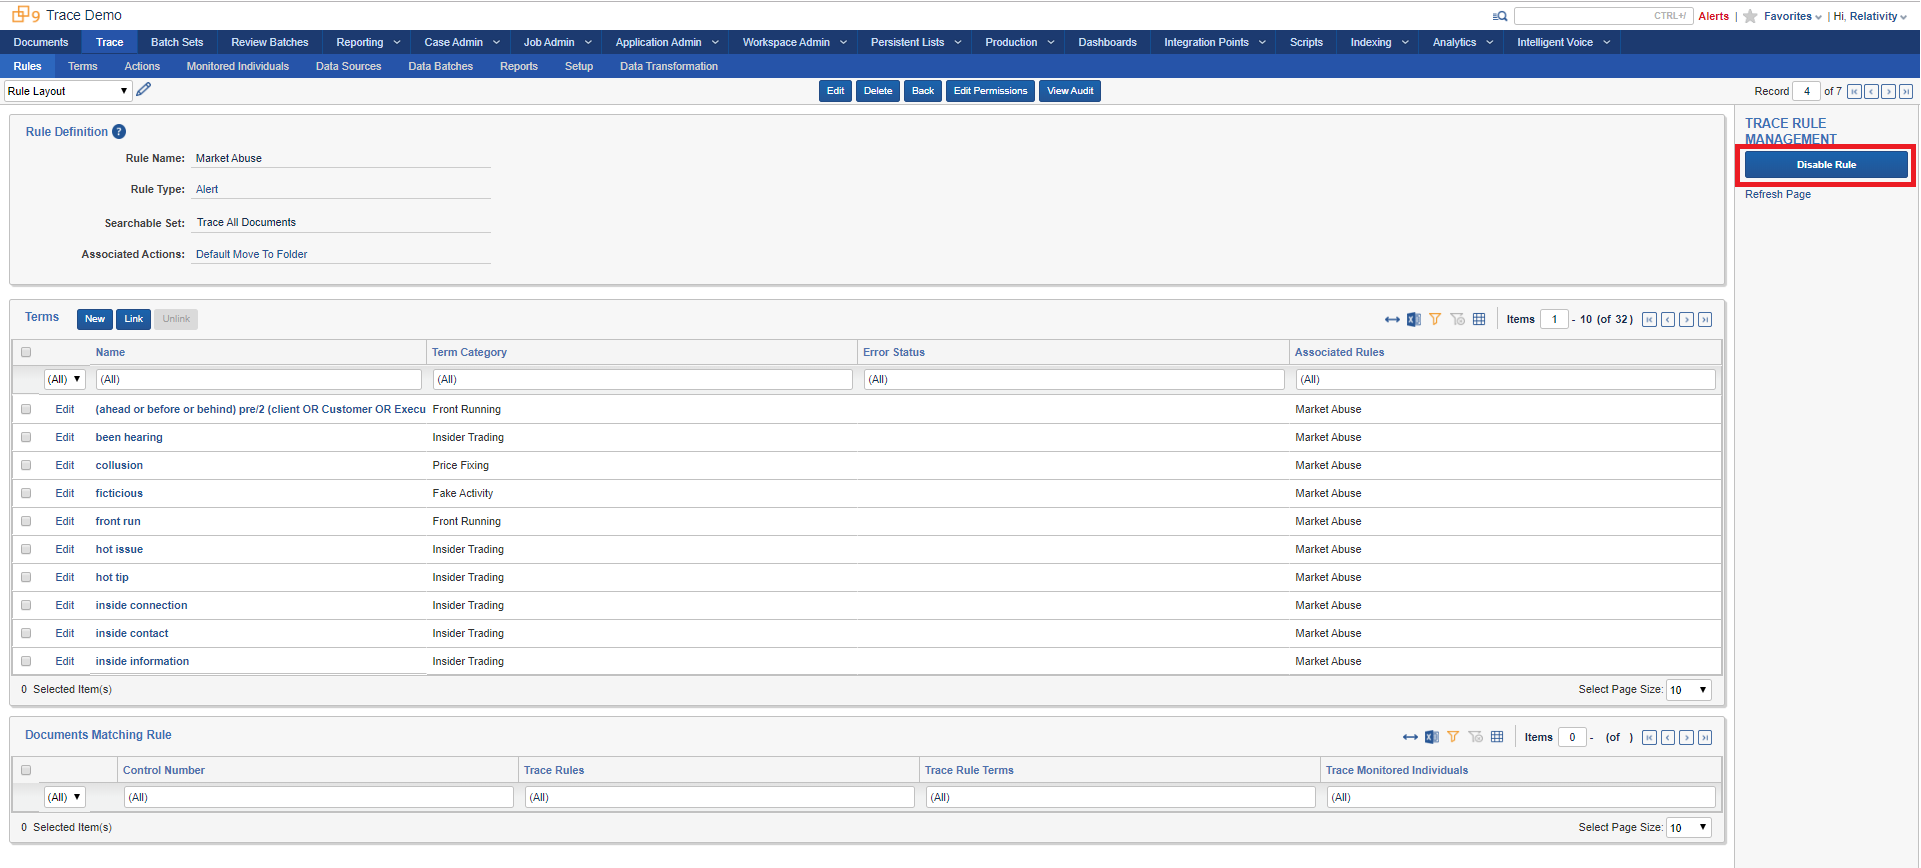
Click the Enable Rule console button under Trace Rule Management section:
-
The rule is now Enabled
-
As data is ingested, this rule will be automatically applied to all incoming documents
-
Section 2: Importing Data and Running Rules
-
Now let’s test our rules by adding live stream of data into the workspace with Office 365 Data Source. Go to the Trace:Data Sources tab

-
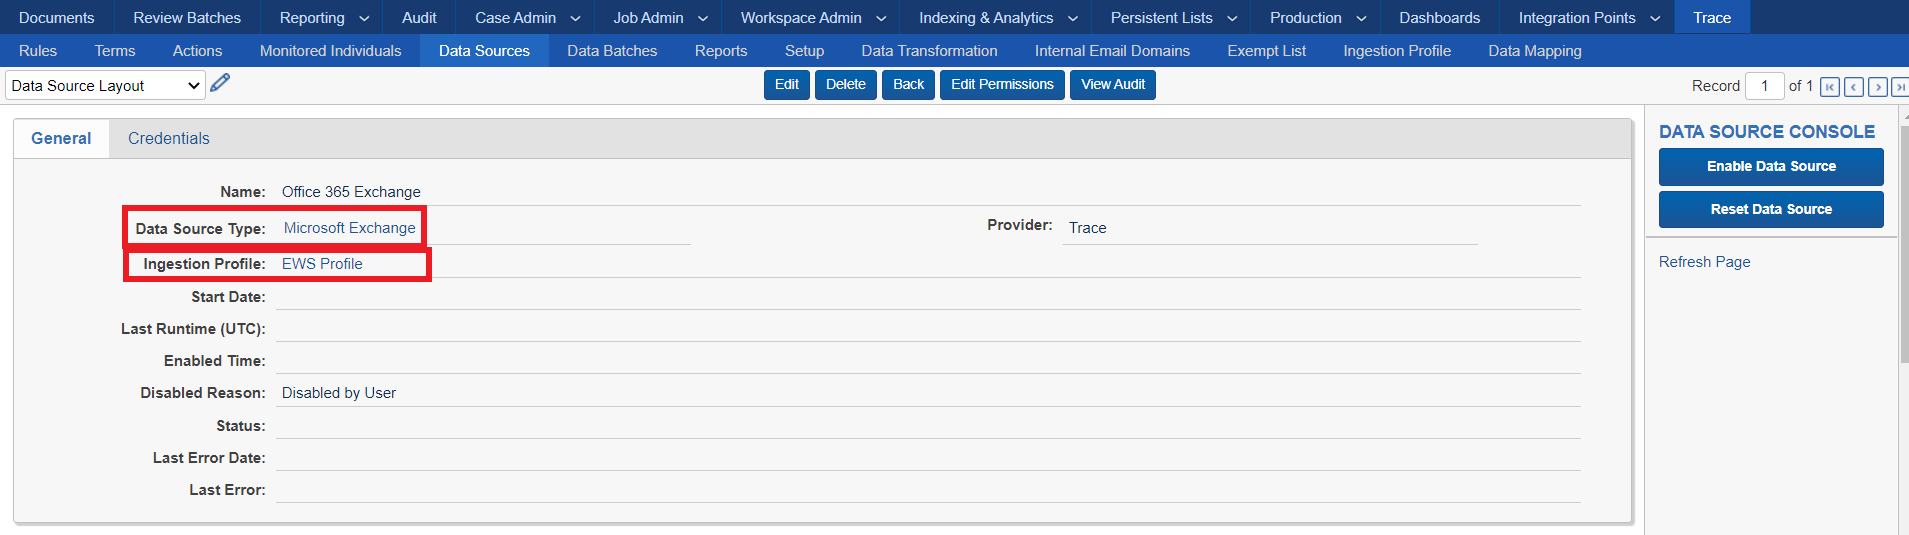
Click on the Office 365 Exchange data source to see how it is configured
-
Data Source Type: You can choose which type of data you want to ingest. This instance has been setup with a few basic types. Trace can support 40+ different Data Source Types
-
Ingestion Profile: Used for mapping loadfile columns to fields in Relativity and other loadfile specific configuration.
-
Username / Password: secure way to enter authentication information for various Data Sources (on the Credentials tab of the Data Source Layout)

-
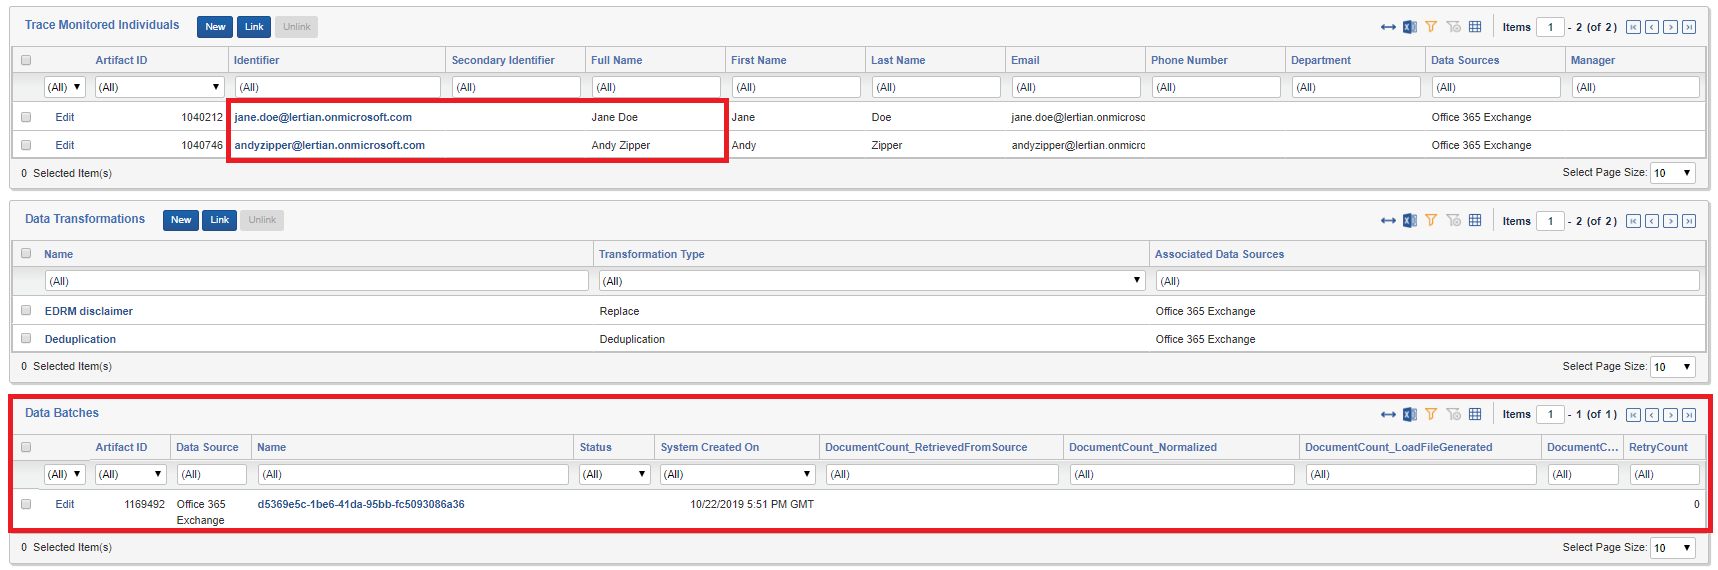
Trace Monitored Individuals: lets you select which people to monitor
-
The Data Source is currently Disabled
-
-
Click Enable Data Source on the right hand side
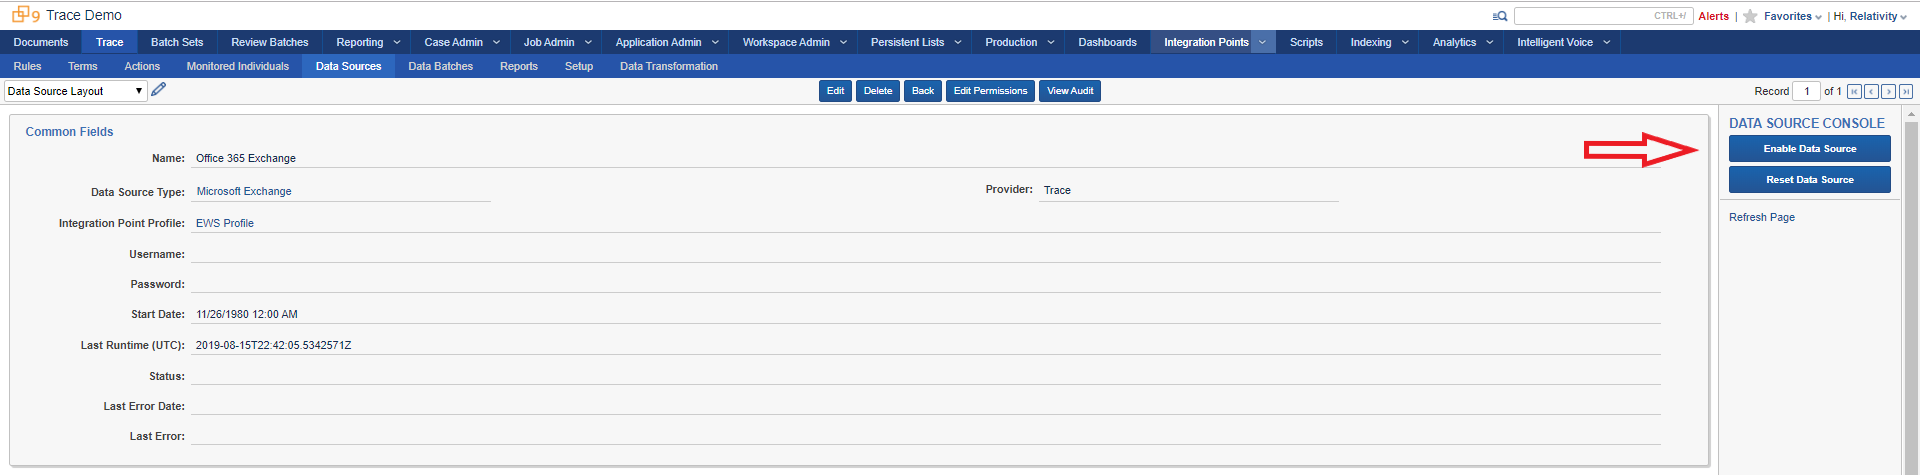
-
Data will begin to get pulled from the exchange server for each of the defined Monitored Individuals. Refreshing the page will show data batches as they are pulled from the data source and processed (it may take several minutes for first data batch to be fully created). You can see how much data each Data Batch retrieved and corresponding statuses. Once you have a few Data Batches in “Completed” state the rest of the Trace workflow automatically triggers.
As time goes on, more batches with data will be created and ingested: 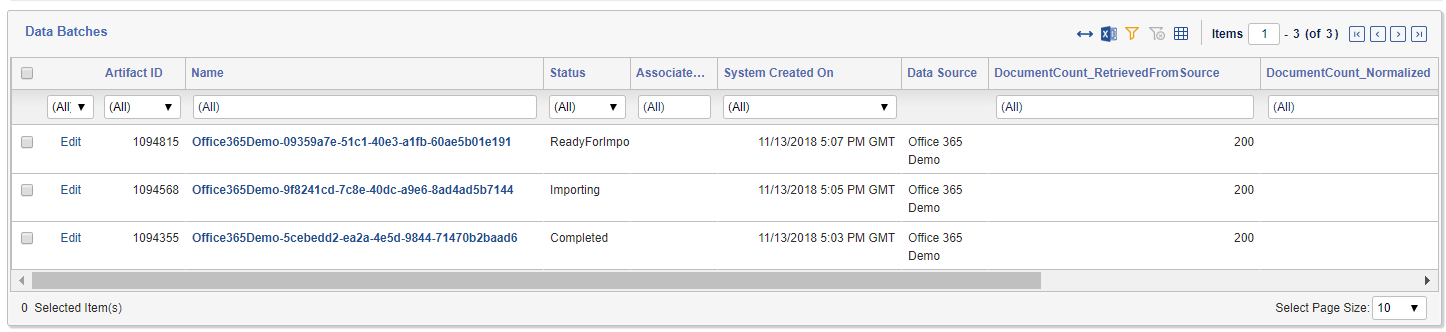
Section 3: Viewing Results
-
Click on Documents tab:
-
Data is proactively being retrieved, extracted and ingested
-
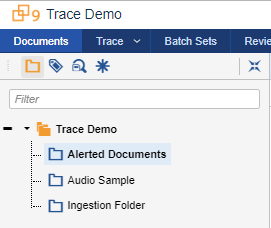
For this demo, all ingested documents are routed to the Ingestion Folder
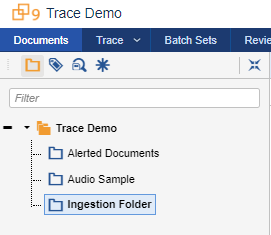
-
Documents matched to the Market Abuse rule will have the Default Move To Folder action execute. The matched documents will appear under the Alerted Documents folder.
-
Navigate to the Trace Demo root folder. You will find the “Trace Search Index” is built automatically for your ad-hoc searching.
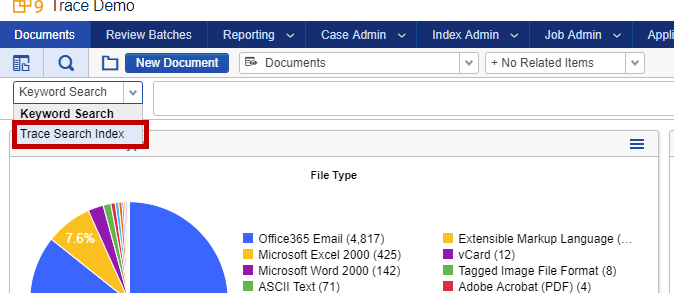
-
-
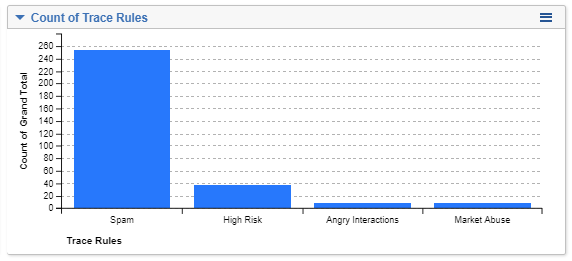
Explore Dashboards
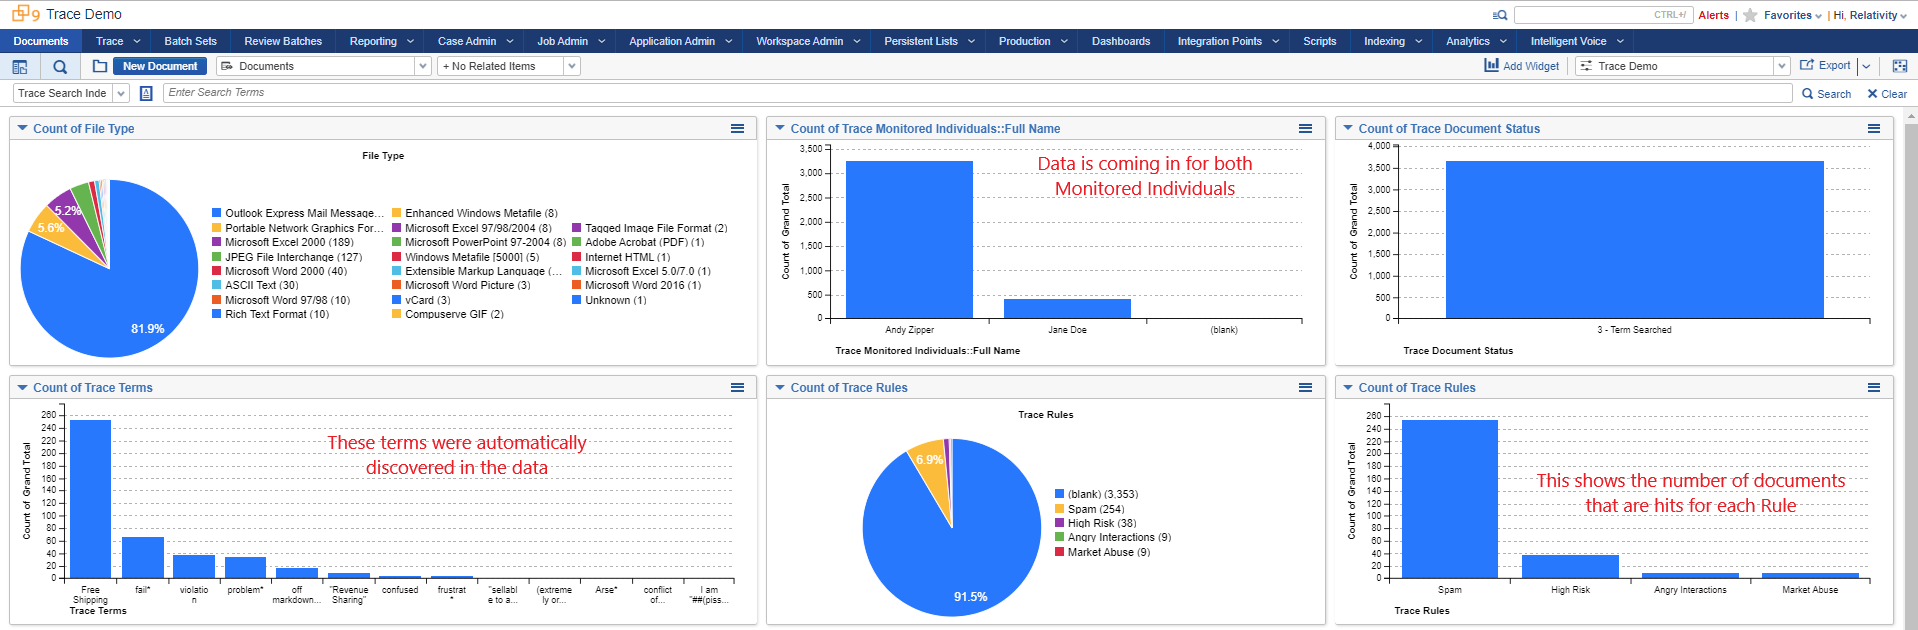
- Once all the data is ingested and analyzed about 8.5% of ingested documents have matched the rules:
(blank) denotes the number of documents where no Rules were matched.
- Once all the data is ingested and analyzed about 8.5% of ingested documents have matched the rules:
-
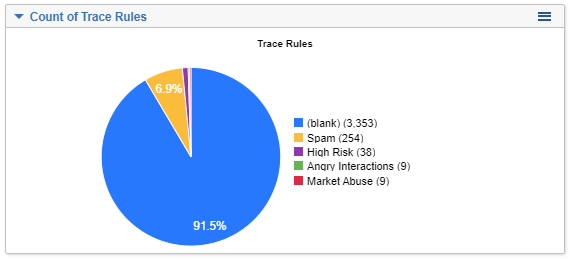
All of the Rules that matched:
-
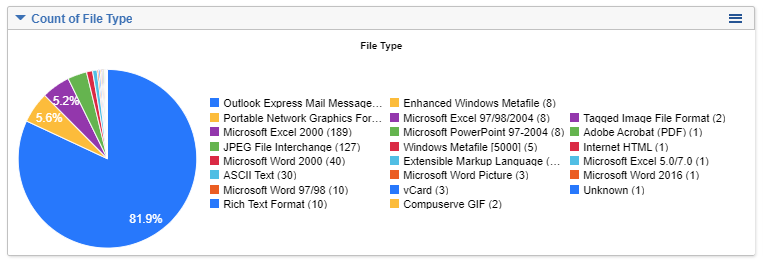
File type breakdown of ingested documents:
-
Review matched documents
- Click on “Market Abuse” bar on the Rules widget
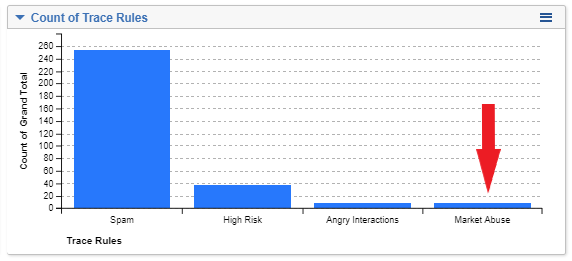
- Click on “Revenue Sharing” on the Terms widget
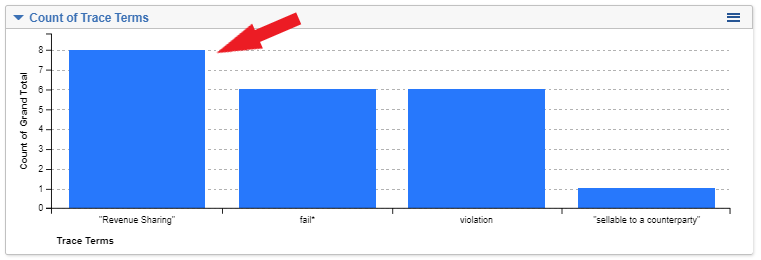
- Click on the top document in the list:

- Explore document details:
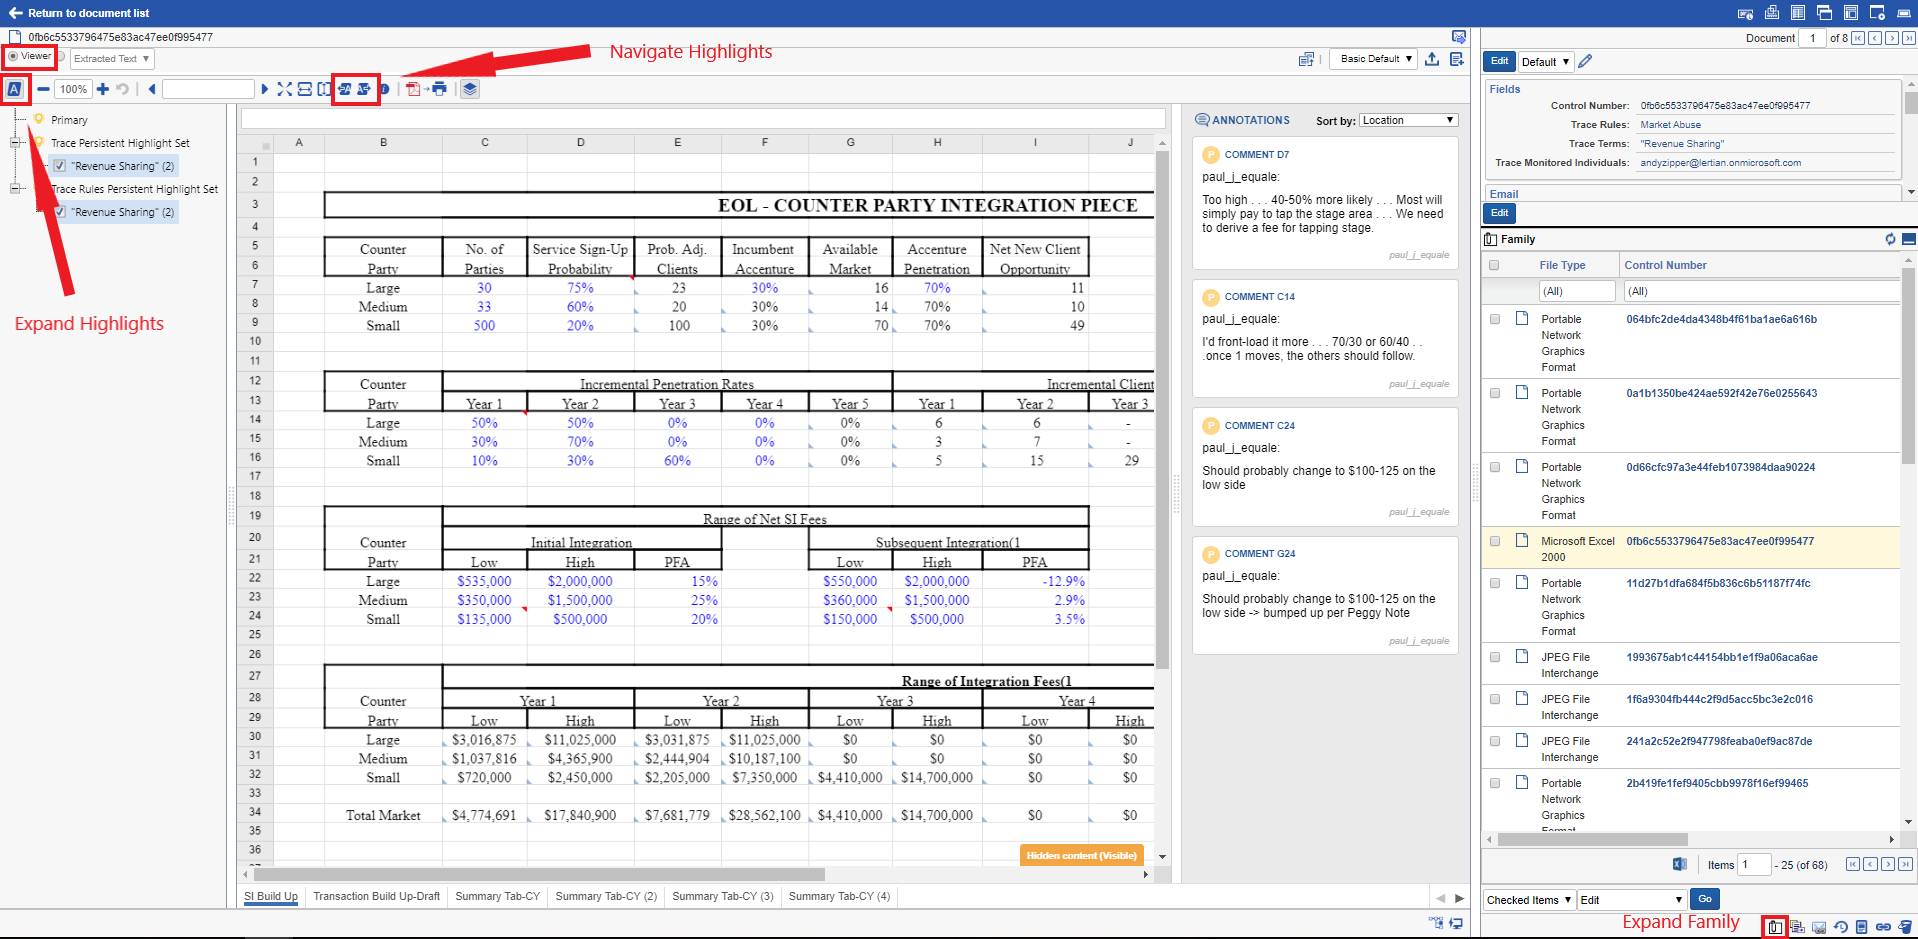
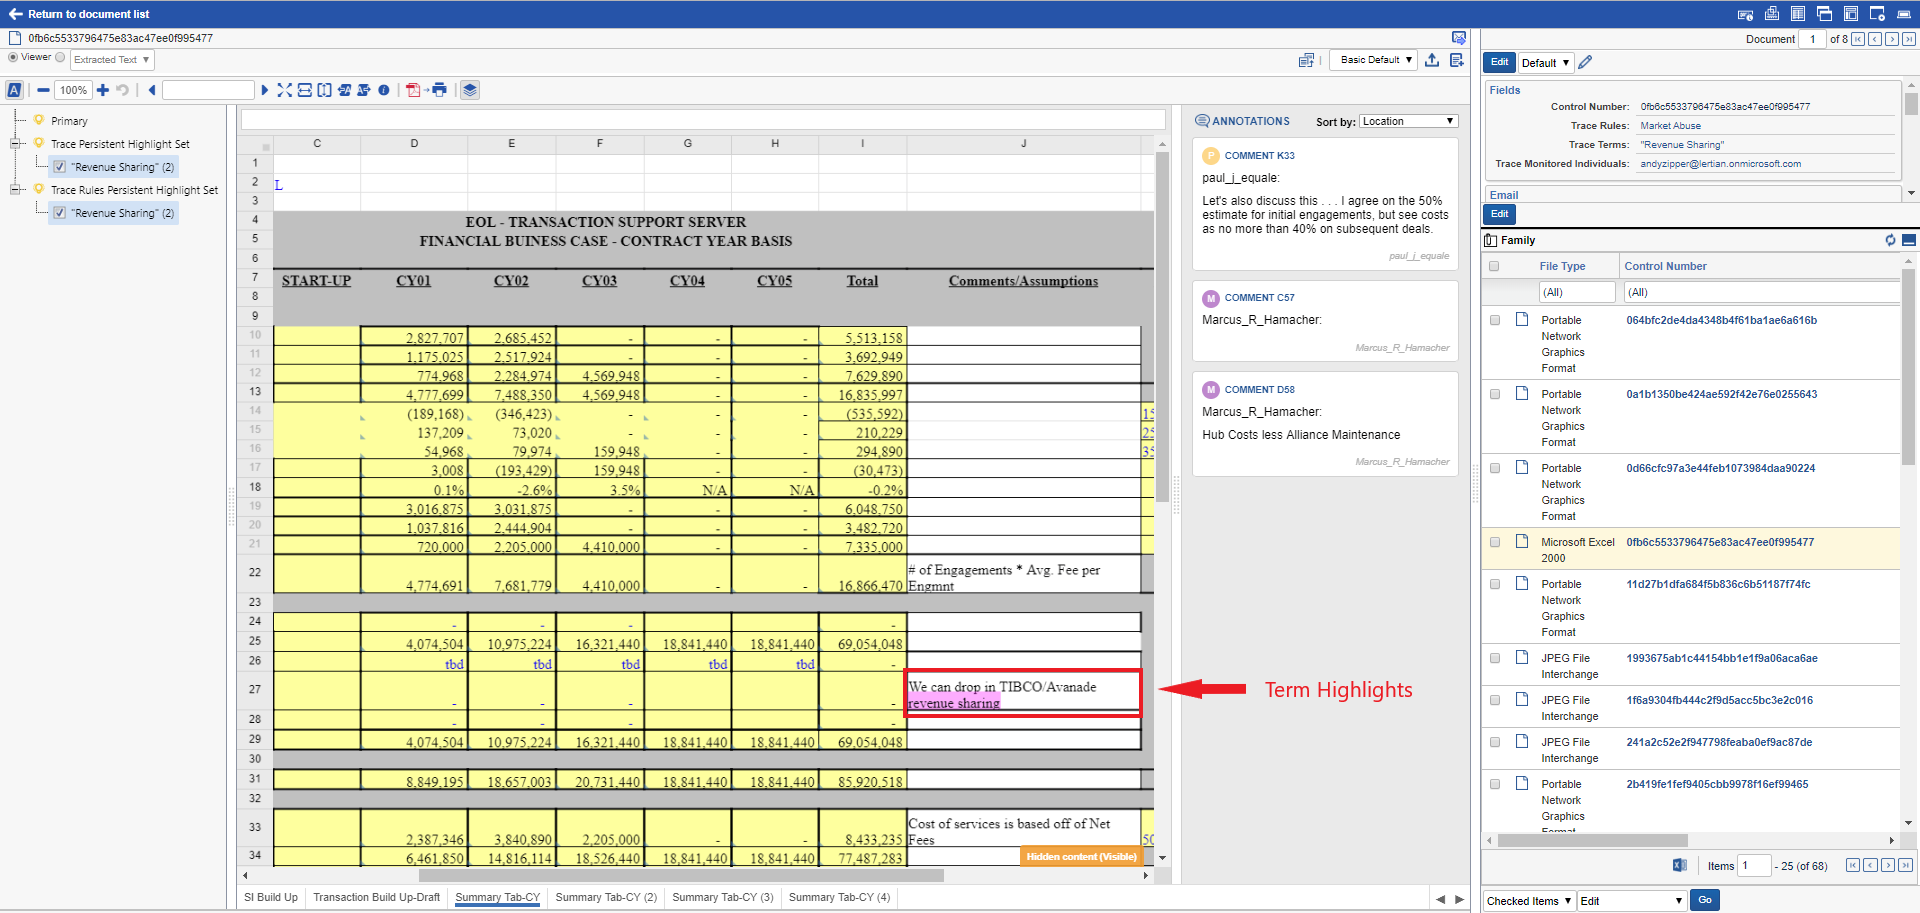
-
Matched terms are automatically highlighted in the document
-
Document text and meta-data was automatically extracted
-
Related documents are displayed in the “Family” section
- Click on “Market Abuse” bar on the Rules widget
Section 4: Recap
Thanks for completing Demo A! Quick recap, here’s what we did:
-
Enabled Market Abuse rule for continuous evaluation
-
Viewed rules that are based on Saved Searches and Trace Terms that have an associated action of moving the document to another folder.
-
Enabled ingestion of documents, proactively from live Office 365 instance
-
Validated that the documents were ingested into the workspace, automatically indexed, searched, tagged and moved
-
Reviewed a matched document in the viewer with extracted data, related documents and highlighted terms
Let us know what you think! Reach out to trace@relativity.com with any feedback. Thanks!
DEMO B: Running a Disposal Rule
-
Go into the Trace Demo workspace
-
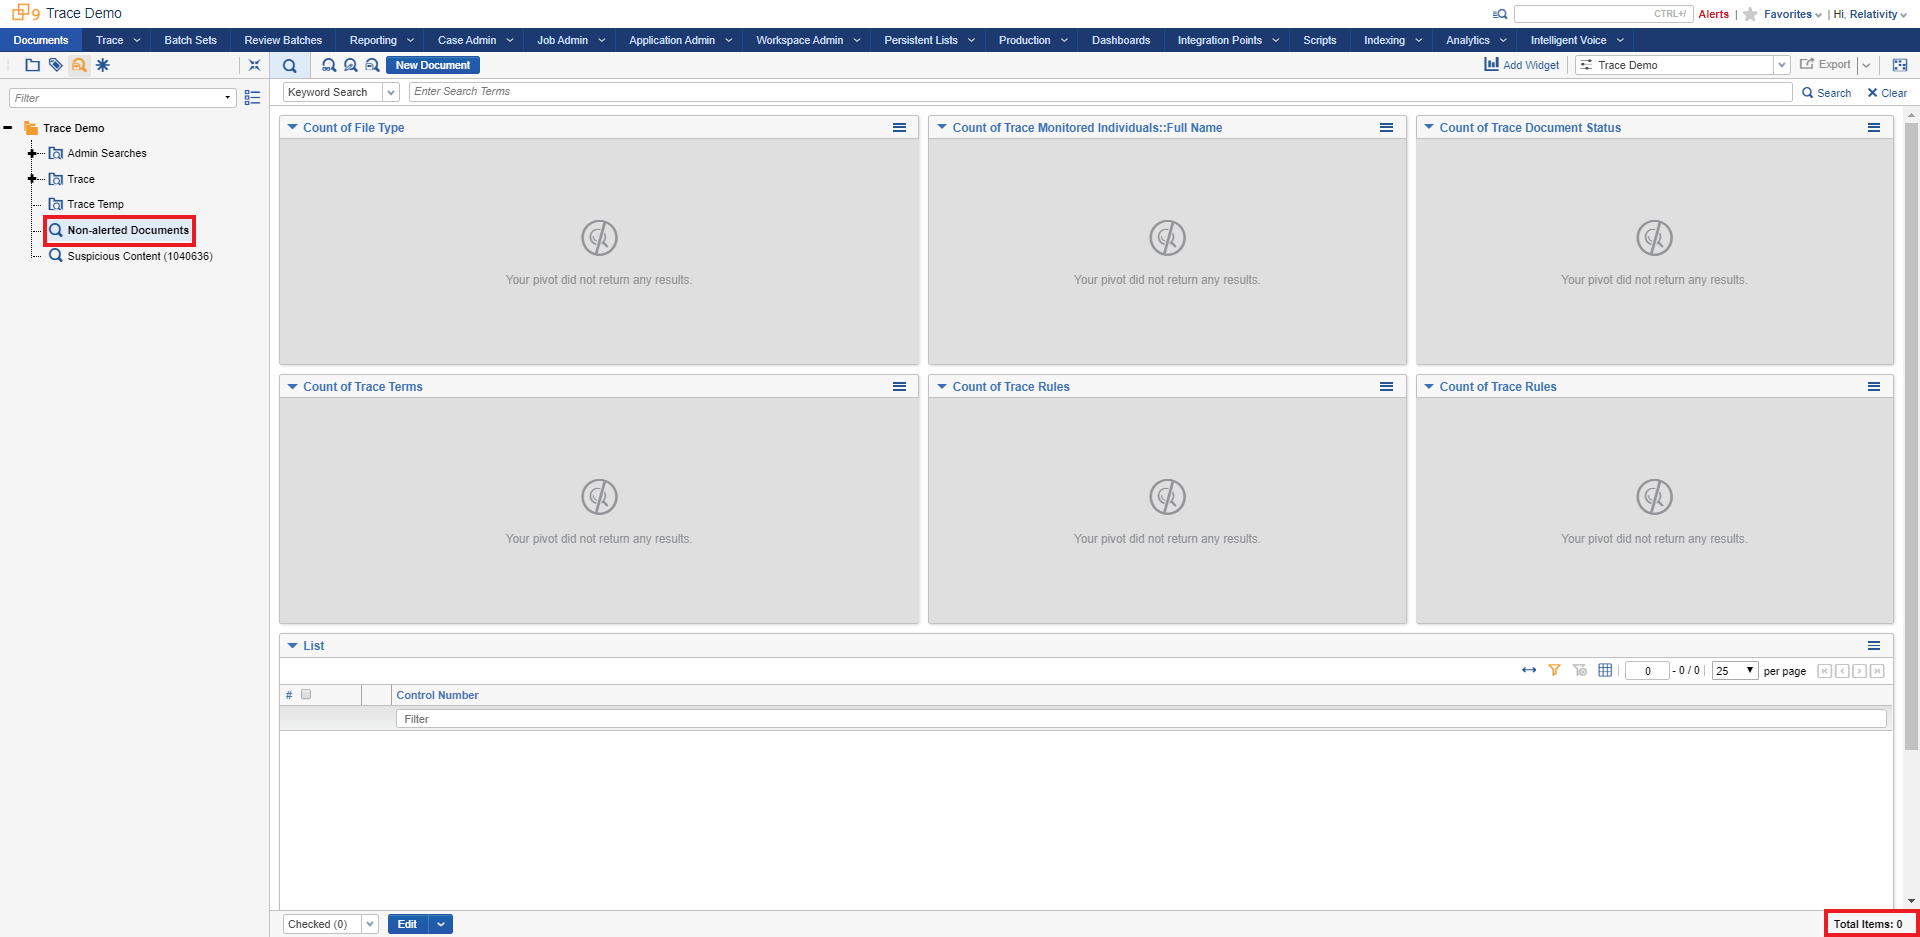
Let’s check out our “Non-alerted Documents” Saved Search. Go to Saved Search browser in the Documents tab and select the “Non-alerted Documents” Saved Search. You’ll notice there are ~5k documents that are currently in this Saved Search.
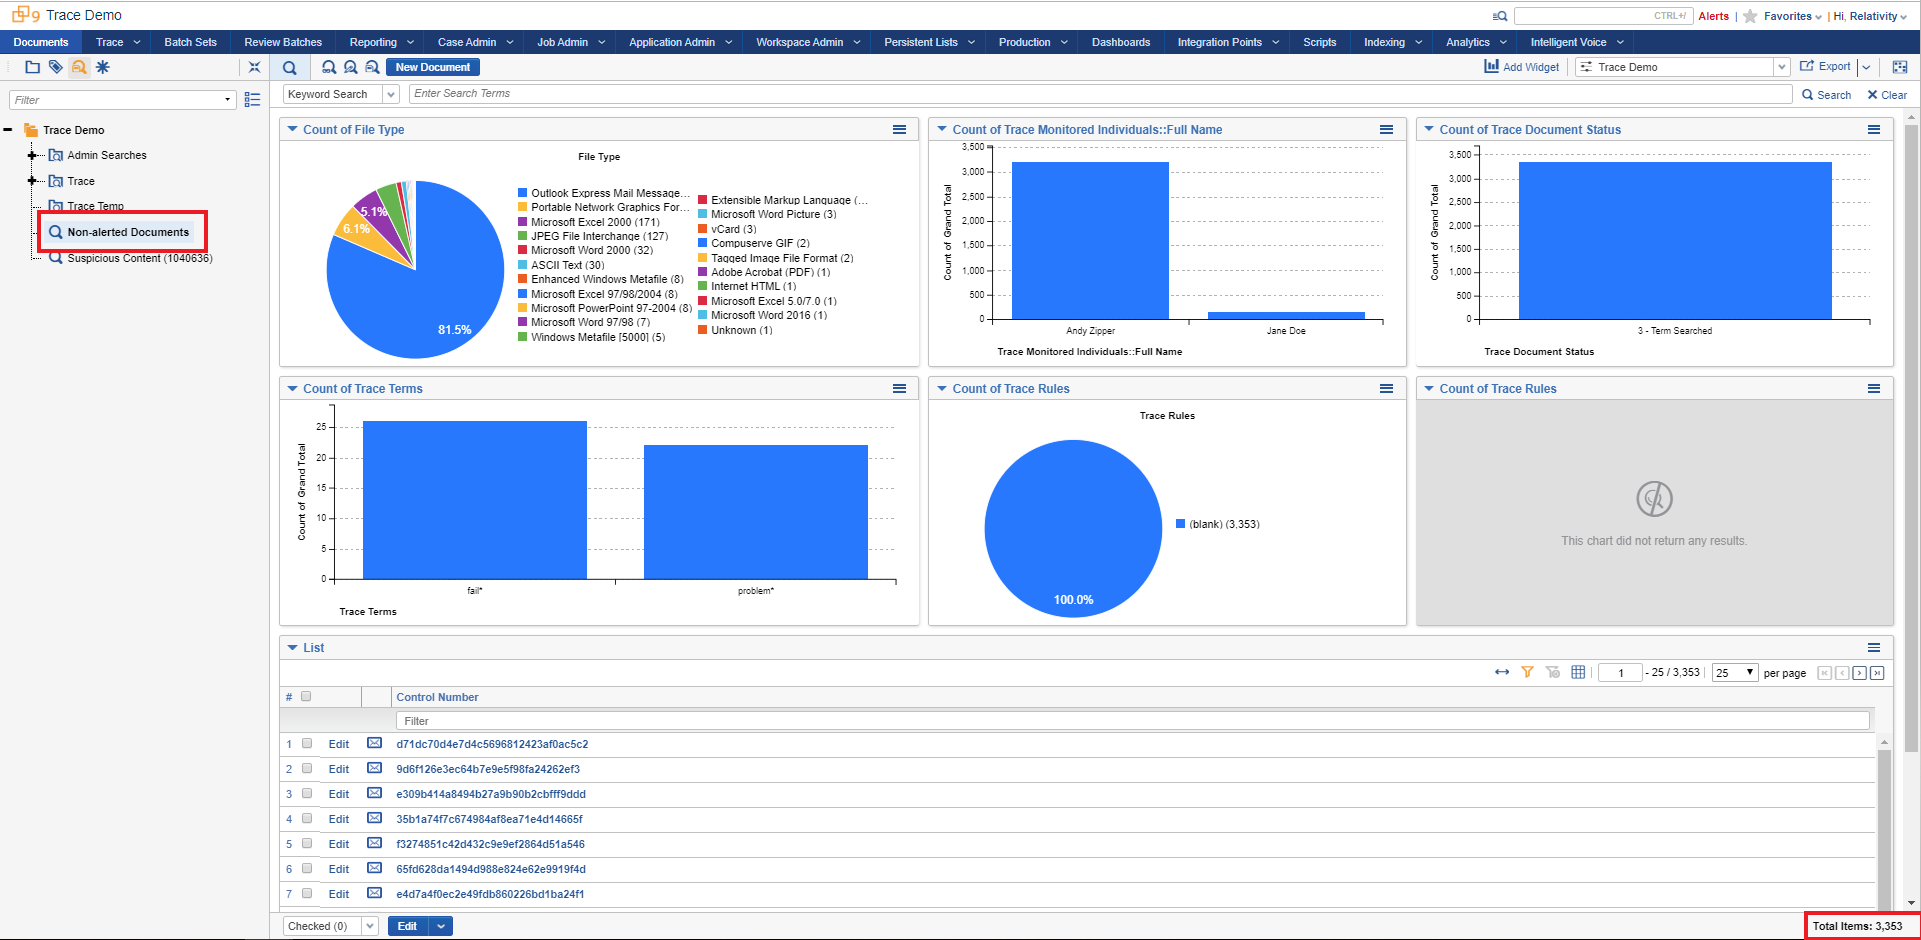
Count on non-alerted documents might vary
-
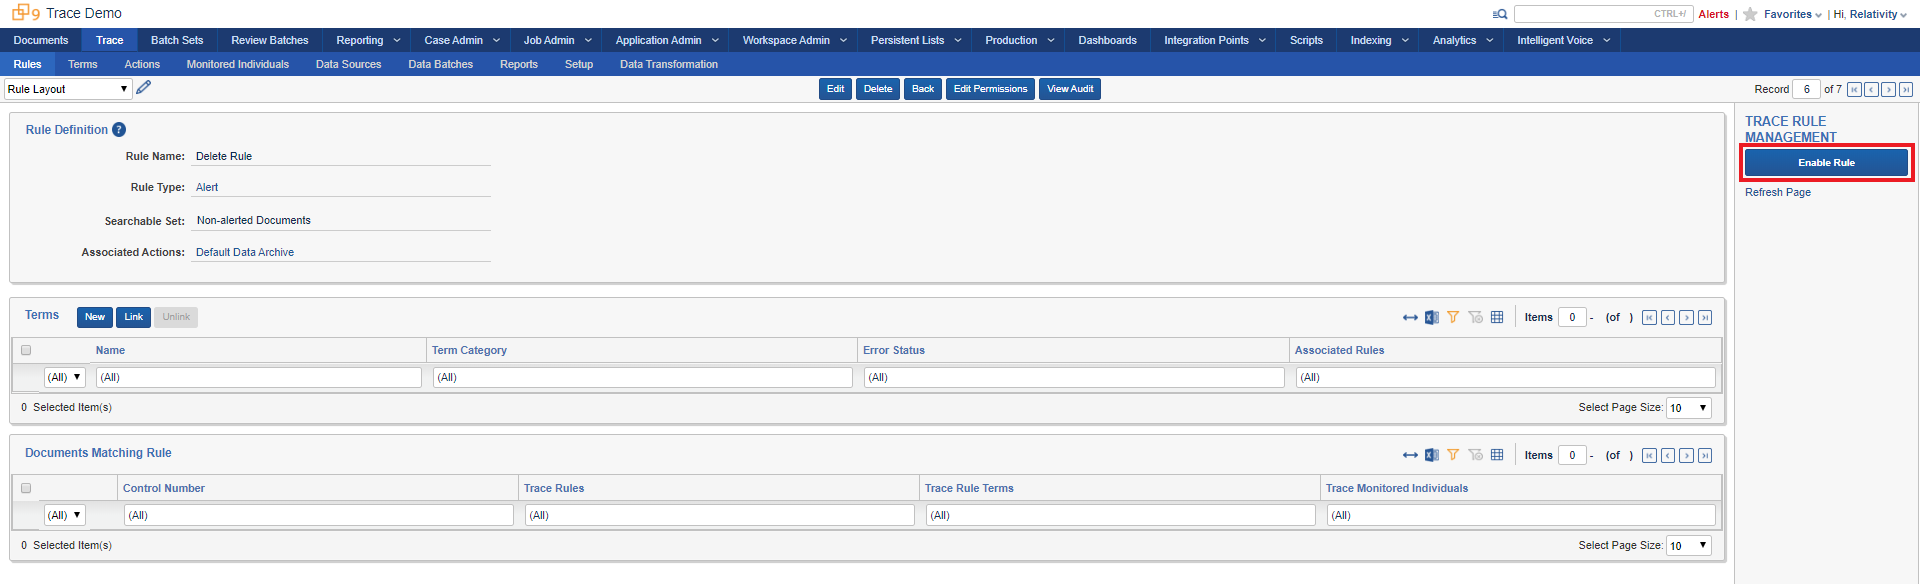
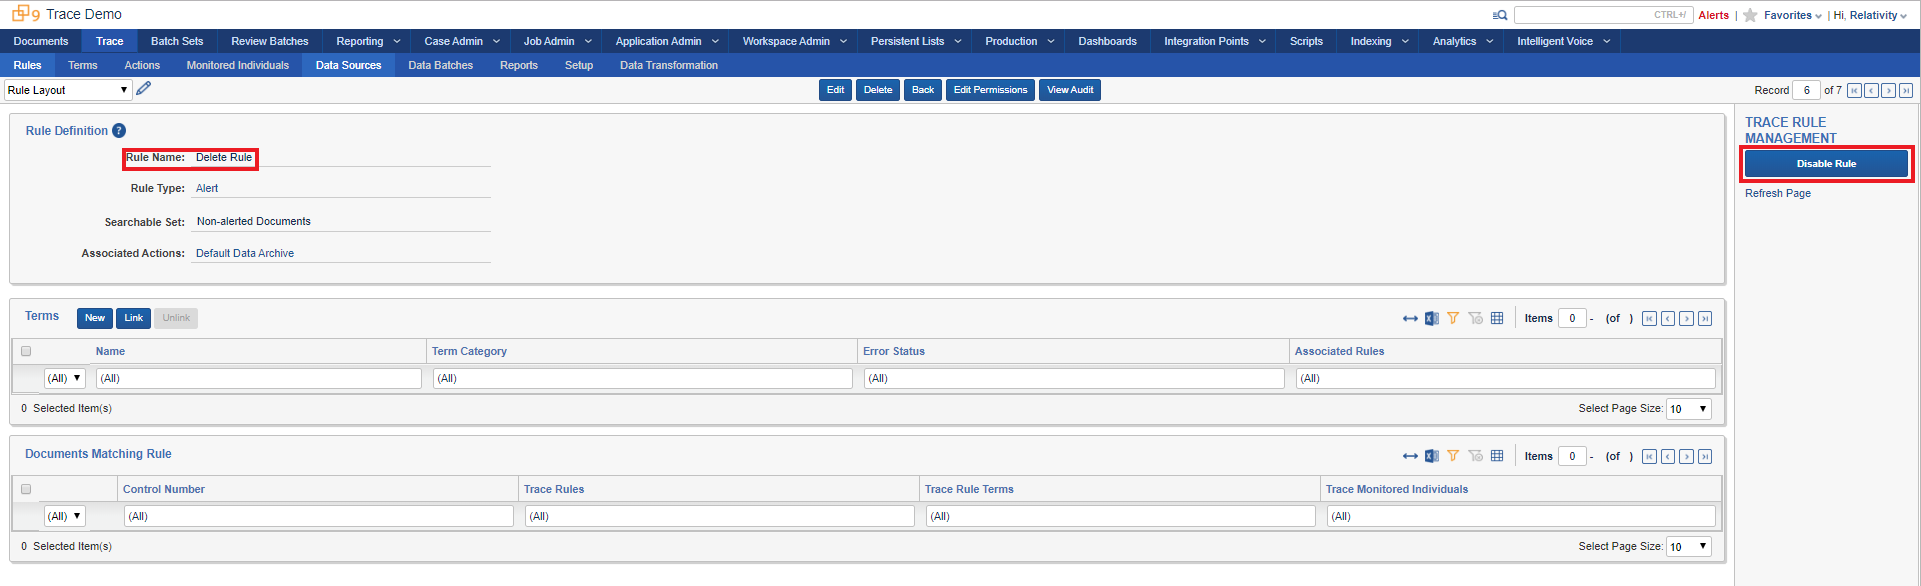
Click into the Trace:Rules tab to see all rules in the workspace. The Delete Rule has been pre-created for you. Click into the Delete Rule.

-
You’ll notice that the Delete Rule follows a similar format to the prior demo. The rule runs on the “Non-alerted Documents” Saved Search and has the “Default Data Disposal” action associated with it. Once enabled, This action will delete all documents in the Saved Search that were created before the set retention length. This will enable you to have an automated retention policy in Relativity.
For this demo retention has be purposely set to 0 hours, which means that all of the
non-alerteddata will be delete as soon as the rule runs.For Saved Search recommendations, see Data Disposal Action Type in User Documentation
-
Now let’s enable the rule so Trace can start enforcing your Data Disposal policy. Go to the Trace:Rules tab again and click on the “Delete Rule”

-
Click on Enable Rule in console button under Trace Rule Management section
-
Go back to the Saved Search Browser in the Documents tab and select the “Non-alerted Documents” Saved Search. Within a few minutes you’ll start to see documents getting deleted from this workspace.
- Go to Trace:Rules , navigate to the Delete Rule and Disable it
Let us know what you think! Reach out to support@relativity.com with any feedback. Thanks!