Microsoft O365 Teams Chat
This topic provides details on how to capture Microsoft Office 365 Teams Chat messages via Collect.
Requirements
Before using this data source, note the following license requirements, version support, and special considerations.
License requirements
The following licenses are required to use this data source:
- Microsoft 365 E5/A5/G5
OR
- Microsoft 365 E3 plus one of the following:
- Microsoft 365 E5 Security Add-on
- Microsoft 365 E5 Compliance Add-on
- Microsoft 365 E5 Information Protection and Governance Add-on
- Microsoft 365 E5 Information Protection & Data Loss Prevention Add-on
For more details on Microsoft 365 requirements, see Accessing Microsoft 365 tenants on the Relativity documentation site.
Versions supported
We support Microsoft 365 E3, E5, A5, and G5.
Considerations
Note the following considerations about this data source:
Data Access
- The connector can access data regardless of the geographic location the data resides in when Microsoft Multi-Geo capabilities have been implemented.
Data Filtering
There are two levels of filtering data:
- Data Source - data is being filtered according to specified Monitored Individuals. No filter is applied at message level. So, if a Monitored Individual exists in a channel, we will ingest the whole conversation for the day. If a conversation does not have any Monitored Individuals as participants for that day, we don’t ingest the conversation at all.
- Data Batch- only messages with data for the date that matches the Data Batch collection period will be captured. For example, a message that has been exported for 10/1/2021 will be captured by the Data Batch that has collection period from “10/1/2021 00:00” to “10/2/2021 00:00”.
Chat content
Note the following considerations about how chat content is captured:
- Mentions are captured as plain text.
- Formatted text is captured as plain text.
- Numbered rows are captured as a single line.
- Team meetings are captured as message placeholder.
- Emojis are collected as plain text.
Data Format
Slack content will be displayed in the Relativity Short Message Format (RSMF) in the Relativity Viewer to provide reviewers with a native chat like review experience. You can find more information on the Relativity Short Message Format here.
Information captured
This section lists what activities and, if applicable, metadata are captured when you use this data source.
Activities captured
The following table lists activities captured by this data source:
| Activity | Notes |
|---|---|
| Combined chats | Chats are combined into easy-to-read threads |
| One-on-one chat messages | |
| Group chat messages | |
| Public team messages | Applies to both public and private channels |
| Private team messages | Applies to both public and private channels |
| Organization-wide team messages | Applies to both public and private channels |
| Last version of edited messages | |
| Chat meetings | Includes chats via internal Teams video calls only, not external |
| Attachments | This includes archived attachments and Audio and Video attachments |
| Stickers | |
| Images | |
| Code snippets | |
| Message count metadata | |
| Attachment count metadata | |
| Message title | |
| Deleted messages | |
| Data for accurate search and retrieval during eDiscovery | Includes preserved metadata and original message time |
Activities not captured
The following table lists activities not captured by this data source:
| Activity not captured | Notes |
|---|---|
| GIF collection | |
| Reaction collection | MS Export API does not yet support this |
| Summary record collection for every Microsoft Teams meeting or call | |
| User profile images | |
| Chats during externally-hosted Teams video calls | |
| Participant leaving/being deleted from the channel | Participant is captured only if they wrote a message |
| Self Chats | These are messages that a user sends to themself |
| Messages submitted by unlicensed O365 User | Microsoft Export API does not support the collection of this data |
Metadata captured
The following table lists metadata captured by this data source:
| Field | Description |
|---|---|
| DATE | Start date of a chat or start date of a slice in the chat split into slices |
| SUBJECT | Friendly name of the team and channel |
| FROM | The first person to send a message in that respective slice |
| TO | Chat attendees |
| CONVERSATION-ID | Unique identifier - when creating a data mapping, set Read From Other Metadata Column to Yes. |
| X-RSMF-EndDate: | End date of the chat/slice - when creating a data mapping, set Read From Other Metadata Column to Yes. |
| X-RSMF-EventCount: | Number of messages in the chat/slice - when creating a data mapping, set Read From Other Metadata Column to Yes. |
| X-RSMF-AttachmentCount: | Number of attachments in the chat/slice - when creating a data mapping, set Read From Other Metadata Column to Yes. |
A “Slice” of data refers to a start and end time of data that will be captured in one Relativity Document. Unless specified, a slice will contain one days worth of data.
Setup instructions
This section provides details on the prerequisites and steps for setting up this data source.
Prerequisites
You must have the following in order to complete the setup instructions for this data source.
Standard prerequisites
Prior to creating the Data Source, install the Collect application and configure the appropriate instance settings by following the Using Relativity Collect page.
Company specific prerequisites
You must have the following company-provided information to complete the authentication steps that precede setting up the data source:
- Access to the Azure portal and an active account
- A Client Secret
- An O365 domain name
- An Application / Client ID
Data transfer prerequisites
You must have the following information to complete the data transfer.
- An application ID
- A Client secret
- An O365 domain name
Authentication
Before configuring the data source complete the following authentication steps.
We strongly recommend registering a separate Azure Application for each Data Source.
Try to avoid running parallel Teams connections from the same Azure Application as Microsoft will throttle calls causing collection jobs to fail.
To register your app:
- Open your Azure Portal.
- Click More Services.
- Search for and select Azure Active Directory.
- In the left-navigation menu, click App registrations.
- Click New Registration. This will open the Register an application page.
- Enter an application name in the Name field.
- Select Accounts in this organizational directory only as the supported account type.
- Enter the redirect URL, http://localhost/ or https://localhost/, as the sign-on URL.
- Click Register. For more information on registering an application in Azure, see Microsoft’s documentation.
From the app’s page, add permissions to the web API:
- Click API Permissions.
- Click Add a permission.
- Click Microsoft Graph.
- Select Application Permissions.
- Select the following options from the Application Permissions section:
- ChannelMessage.Read.All.
- Chat.Read.All.
- Directory.Read.All.
- Files.Read.All.
- Group.Read.All.
- Organization.Read.All.
- TeamsTab.Read.All.
- User.Read.All.
- Click Add permissions.
- Click Grant Permission.
To request access to the protected APIs mentioned in this topic, complete the following request form. Microsoft review access requests every Wednesday and deploy approvals every Friday, except during major holiday weeks in the U.S. Submissions during those weeks will be processed the following non-holiday week. The person who submits the above form to Microsoft needs to receive confirmation from Microsoft that permission has been granted. For additional details about Teams security, contact Trace support.
Grant Admin consent for the API:
- Click the API Permissions tab.
- Click Grant admin consent for [tenant].
- In the pop-up window, click Accept. If you do not have the ability to grant Admin consent for application permissions, you will need to find an Admin that can consent.
- Once clicked, the window will show all permissions granted.
- Verify all permissions have been granted.
- Click Accept to grant the permissions.
Generate Client Secret:
- In the left navigation menu, select Certificates & secrets.
- Select New client secret.
- Enter a description in the Description text box.
- Set the expiration time frame to Never.
- Click Add.
- Click on the clipboard and copy secret to clipboard to paste in your text document. Save this secret, as you will need it to set up your data sources in Trace.
Microsoft will only show this secret this one time; there is no way to recover a secret if it is forgotten or lost. Make a note of the Application ID that Microsoft assigned to the app registration. This ID is also required for setup of data sources in Trace.
You will need the following information to complete setup of the data source from the Trace front end:
- Application ID
- Client Secret (copy the Value field)
- Domain (mycompanydomain.com)
Make sure you copy the Value field item for your Client Secret. Do not accidentally copy the Secret ID item as this is not the your Client Secret.
Limit the access of Relativity Collect to specific Microsoft user accounts and mailboxes by using the New-ApplicationAccessPolicy Powershell cmdlet. For more information, see Microsoft documentation.
Setup in Trace
The following sections provide the steps for installing Collect and configuring the data source.
Collect
Prior to creating the Data Source, install the Collect application and configure the appropriate instance settings by following the Using Relativity Collect page.
Data source
Most parameters work the same for all Collect Data Sources. Follow the instructions from Sections of a Data Source.
O365 Teams specific parameters:
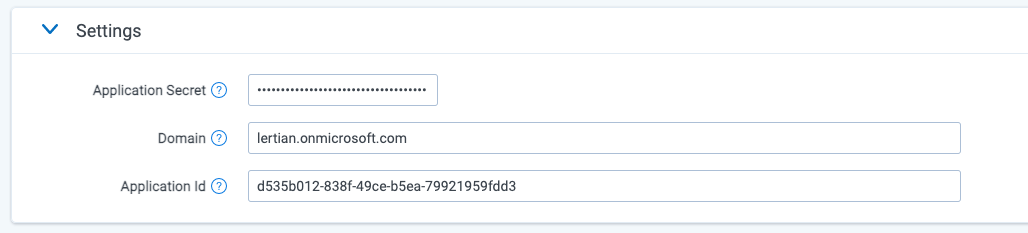
In General section, select Microsoft O365 Teams for the Data Source Type. 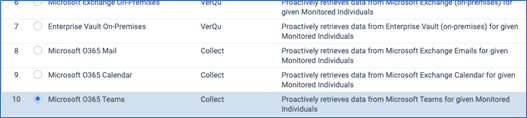
In Settings section:
- Application Secret: The Client Secret provided by the client (see Authentication for more details).
- The following is an example of an application secret, which includes random chars and numbers: NMubGVcDqkwwGnCs6fa01tqlkTisfUd4pBBYgcxxx=
- Domain: The O365 domain name provided by the client.
- Application Id: Application / Client ID provided by the client. For example, 53ba6f2b-6d52-4f5c-8ae0-7adc20808854
In Advanced Configuration section, do the following:
- Frequency in Minutes - enter 1440.
- Merge Batches During Cold Start: enter True.
- Max Number of Batches To Merge - enter 7.
- Collection Period Offset in Minutes - enter 0.